Prerequisites
Before you can add team members to a project, users must first be part of your organization. If you haven’t invited users yet, please refer to the Team Member Management guide to learn how to invite users to your organization.Important: Users must accept their organization invitation before they can be assigned to any projects.
Adding Team Members to a Project
Once users are part of your organization, you can assign them to specific projects: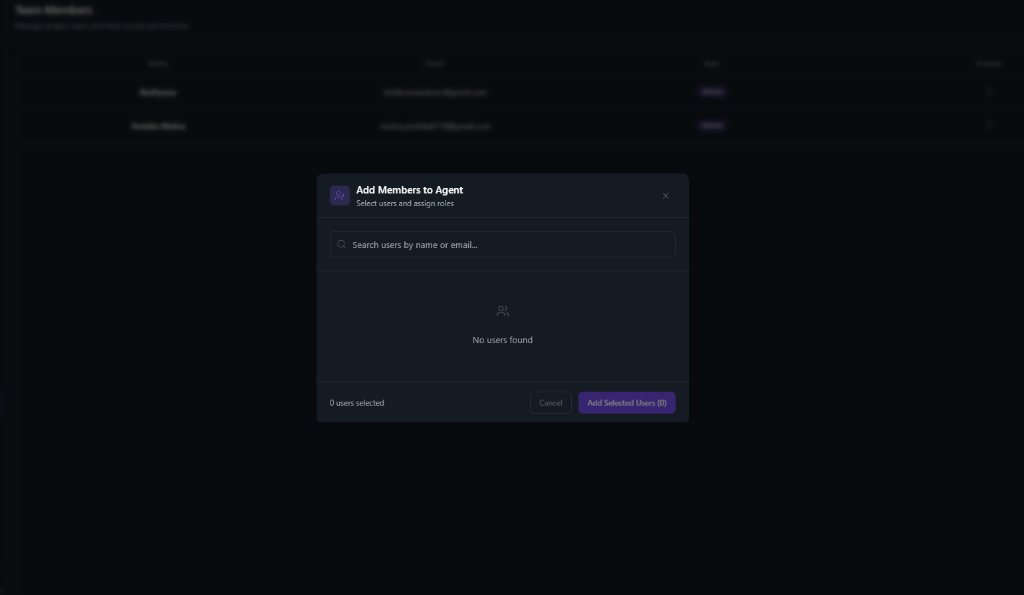
- Navigate to your Project within the dashboard.
- Go to the Team Members or Settings section of the project.
- Click on the Add Members button.
- In the Add Members to Agent modal that appears:
- Use the search bar to find users by name or email
- Select the users you want to add to the project
- Assign appropriate roles for each user
- Click Add Selected Users to confirm.
User Workflow Overview
Here’s the complete workflow for adding a user to a project:Step-by-Step Process
-
Organization Invitation
- An organization admin invites the user via email
- The invitation is sent from the Organization Team Members page
-
User Acceptance
- The user receives an email invitation
- They click the invitation link and accept
- Their account is now part of the organization
-
Project Assignment
- Organization members can now be assigned to projects
- Project admins can add these users to specific projects
- Users are searchable by name or email within the project
Managing Project Team Members
After adding team members to your project, you can:- View Project Members: See all users assigned to the current project
- Update Roles: Modify permissions for project-specific access
- Remove Members: Remove users from the project (they remain in the organization)
Project-Level Roles
Project roles determine what actions users can perform within a specific project:| Role | Permissions |
|---|---|
| Project Admin | Full control over the project, including settings, team management, and deletion. |
| Editor | Can modify project configurations, knowledge base, workflows, and agents. |
| Viewer | Read-only access to project data and analytics. |
Project-level roles are independent of organization-level roles. A user with “Viewer” role at the organization level can be assigned “Project Admin” role for a specific project.
Best Practices
Assign Minimal Permissions
Assign Minimal Permissions
Follow the principle of least privilege by granting users only the permissions they need for their specific tasks.
Regular Access Reviews
Regular Access Reviews
Periodically review project team members and remove access for users who no longer need it.
Use Descriptive Project Names
Use Descriptive Project Names
When managing multiple projects, use clear naming conventions to help team members identify which projects they should access.
Onboard New Members
Onboard New Members
When adding new team members to a project, provide them with context about the project’s purpose and their responsibilities.
Troubleshooting
User Not Found in Search
If you can’t find a user when trying to add them to a project:- Verify Organization Membership: Ensure the user has accepted their organization invitation
- Check Email Address: Make sure you’re searching with the correct email address
- Wait for Sync: If the user just joined, wait a few moments and refresh the page
User Can’t Access Project
If a user reports they can’t access a project:- Confirm they are added to the project team
- Verify their project role has appropriate permissions
- Check that their organization membership is still active
- Ensure they are logged in with the correct account
Related Documentation
- Team Member Management - Learn how to invite users to your organization
- Create a Project - Get started with creating new projects
- Organization Setup - Configure your organization settings