1. Campaign Setup
In the Campaign Setup step, you define the core identity of your campaign.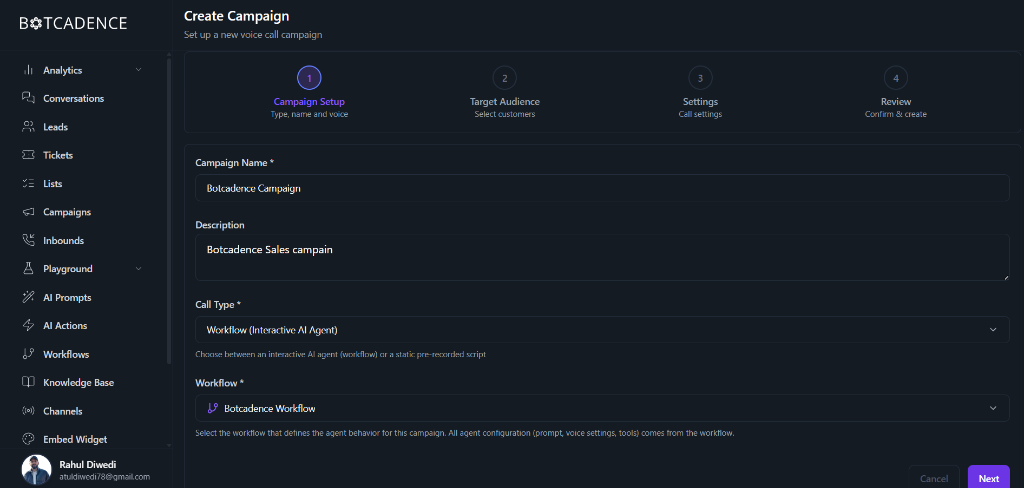
Fields
Fields marked with an asterisk (*) are required.
- Campaign Name: Enter a unique name to identify your campaign (e.g., “January Sales Outreach”).
- Description: Add a brief description of the campaign’s purpose.
- Call Type: Choose how the agent should behave.
- Workflow (Interactive AI Agent): Uses a dynamic workflow to handle conversations.
- Static: Uses a pre-recorded script.
- Workflow: Select the specific workflow that defines the agent’s configuration (prompt, voice settings, tools) for this campaign.
2. Target Audience
Select the customers you want to reach. You can choose from your uploaded lists or segments.3. Settings
Configure when and how frequently your campaign will make calls.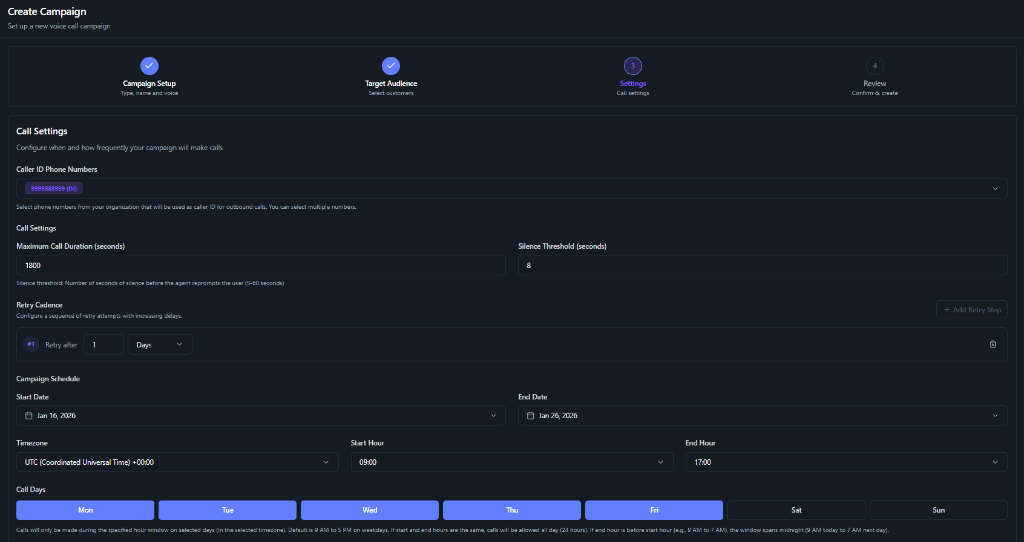
Caller ID Phone Numbers
- Caller ID: Select the phone number(s) from your organization that will be displayed as the caller ID for the outbound calls. You can select multiple numbers if available.
Call Settings
- Maximum Call Duration: The maximum time (in seconds) the call can last before automatically terminating (e.g., 1800 seconds).
- Silence Threshold: The number of seconds of silence to wait before the agent reprompts the user (e.g., 8 seconds).
Retry Cadence
Configure a sequence of retry attempts with increasing delays.- Retry Steps: Add steps to retry the call if it wasn’t connected. For example, “Retry after 1 Day”. You can add multiple retry steps.
Campaign Schedule
Define the schedule for your campaign.- Start Date & End Date: The date range during which the campaign will be active.
- Timezone: Select the timezone for your start and end hours.
- Start Hour & End Hour: The daily time window during which calls will be made (e.g., 09:00 to 17:00).
- Call Days: The specific days of the week when calls are allowed (e.g., Mon-Fri).